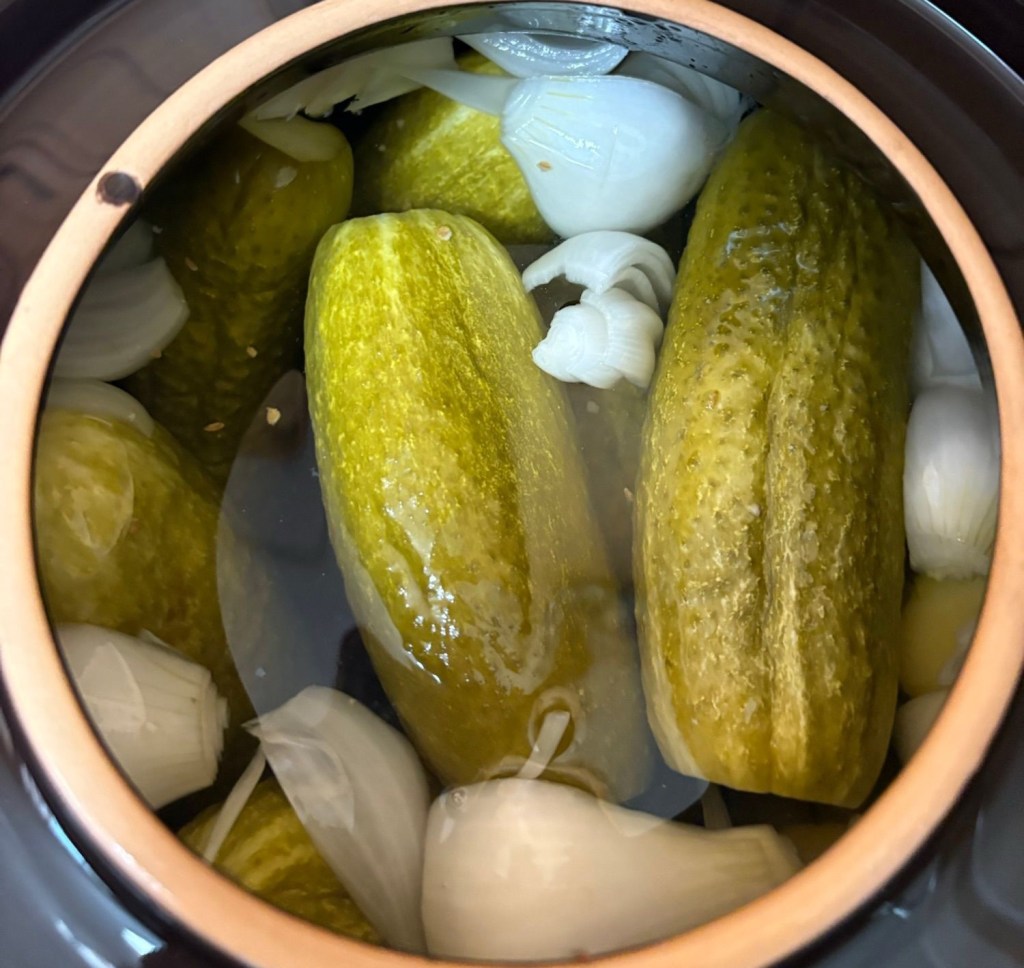
OK in the previous article I gave you a pictorial of my latest adventure. It’s been two days since the pickles have been put in the crock.


And here is the video review:
OK in the previous article I gave you a pictorial of my latest adventure. It’s been two days since the pickles have been put in the crock.
And here is the video review:

I found a pretty simple looking recipe for pear wine at: CommonSenseHome. The tips were helpful and it looks like something I might have a hard time messing up. I began amassing the ingredients.
I put the first batch of pears up to ripen on the porch. I turned them daily. The tiny imperfections that I’d overlooked deepened in color, spreading like a bad relationship across the surface. I had to rethink my strategy.
I’ll purchase the pears! Two 3-pound bags of pears delivered to my door. With greedy anticipation, I waited. Alas, they only had one 3-pound bag available with no substitutions. Abuh.
Adjust the sails! Farmers market before a 10 am service? Sure thing. I dress for the occasion:


Did you know that pears in East Tennessee come into season primarily in September. Did you know that I lost track of time for several months and learned it today? Thwarted, but not without hope. Now what?
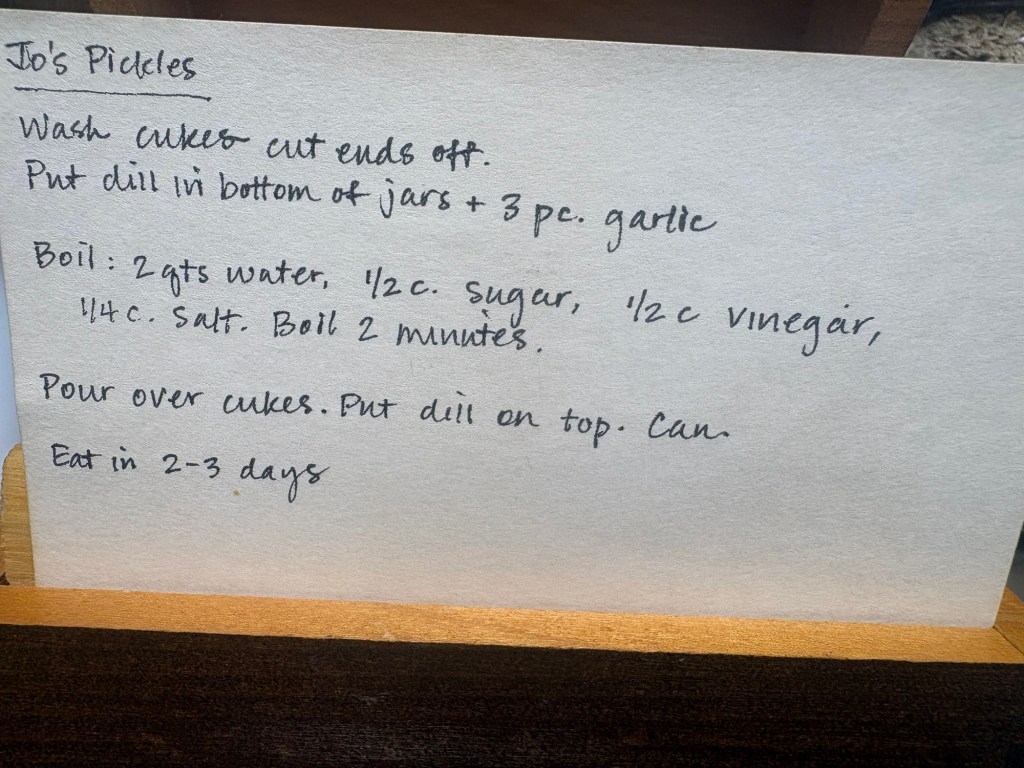
I recently gained access to the family recipes from my client’s deceased mother. She had many duplicates of the same recipe for two-day pickles. I read it several times as I sorted through the recipes enough that I felt confident enough to buy pickling cucumbers and I like onions so I bought enough to make a gallon of brine.
Crap. No dill. Good thing I had onions? Onward!


Now we wait. That was quite a few switchbacks to arrive at pickles from pear wine. Such is life. I’ll update when I’ve tested the goods.
I confess, I’m not typically one to experiment with an untested recipe, but no grits, no glory, right? Right?!
I found this recipe and decided to try it because I’m looking to eliminate or at the very least reduce the flesh I consume. I know many who do quite well without even any animal products, but I’m cool with vegetarian for now.
I’ve decided that I’d rather cook for myself. If the other people in my house don’t like it, they can be the ones to make their own dinner. I’m cooking one meal, the healthy alternative one.
The following is not my original recipe. I found it, tried it, liked it, shared it.
Quinoa Vegetarian Meatballs {Gluten Free Option}
By: Lindsey
Prep Time: 30 minutes Cook Time: 25 minutes Yield: 18 Meatballs
Ingredients
Instructions
Notes:
To make these meatballs gluten free, simply use gluten free breadcrumbs. You could also try substituting gluten free flour for the breadcrumbs but I cannot vouch for how that will work.
I like to make a large pot of quinoa at the beginning of the week, so that I can make these or anything else quickly without having to wait for the quinoa to cook.
(MARE’S NOTE: I whipped up a jar of spaghetti sauce instead of fussing with it, making an easy meal. The meatballs are really worth the wait. My uber-carnivorous roommate and husband devoured it.)
I gush distracted through my days
but when I choke with disgust, starve for poetry,
I dig out their works and cover my ears to the world
The common world where words are disposable,
no longer present pleasure
but tedious imaginings
of short-handed, short-sighted vulgarities.
The world where “u r ok” is acceptable bastardization.

Ready for a binge
I burrow into my favorite comfort foods
like a fork bringing sustenance to my body
I allow them to enter my veins with lusty anticipation.
When I ingest Joel, E.I. Wong, Roads, or Cardiff
I’m blissfully transported, transposed into a new trajectory,
rescued by the unsuspecting, unaware, shiny knights
The breathless depths of my immersion
puddle into my lap, spill onto my blouse
leaving me with short-lived shielding against ignorance
besotting my sensibilities with undulating vocabulary
I lift one last feather towards the wings of Queen Bird.
The final dollop of delectable dessert.
Deep sighs topped with a satisfied burp from my binge-filled indulgence;
Gratefully sated by the authors of still-life slices.

Swiss Chard is one of the multitude of ground candy coming to Herb and Plow CSA shareholders.
I’ve recently moved home to Michigan due to unforeseen circumstances. The weather here has ranged from blistering hot to hokey toot get out the slippers and the sweatshirts. That may not seem weird at the changing of the seasons, but it is weird when it’s happening in the same day.
Despite the radical weather that mimics the falling rain at Herb and Plow Farms, the CSA’s here are equally abundant with their enticing seasonal fare. This week, I’m sharing a family favorite of ours (Spaghetti Squash Casserole), a forgiving Kale/Swiss Chard recipe, a quick Sweet and Sour Swiss Chard, and a One bowl vegan apple gingerbread cake. May the calories not go to waist.
1 spaghetti squash (about 8 inches long)
2 T. butter
1 cup chopped onion
2 medium cloves minced garlic
½ pound fresh, sliced mushrooms
½ t. oregano
1 t. basil
Dash of thyme
Salt and pepper to taste
2 medium chopped tomatoes
1 c. cottage or ricotta cheese (I like the cottage best)
1 c. grated mozzarella
1 cup fine bread crumbs (Italian style is a staple)
¼ c fresh chopped parsley
Parmesan cheese
Preheat oven to 375 degrees. Halve the squash, scoop out the seeds. Bake face-down on oiled sheet until easily pierced by a fork about 30 minutes. (Placing the halves on parchment paper before baking will make your clean-up SO much easier)
Let stand until cool enough to handle, then scoop out pulp and place in large bowl. Meanwhile, heat butter and sauté onions, garlic, and mushrooms with herbs, salt, and pepper. When onions are soft, add tomatoes and continue to cook until most of the liquid evaporates. Stir this mixture into squash pulp with remaining ingredients except Parmesan. Spread into buttered 2-quart casserole. Top with Parmesan. Bake uncovered, 30-40 minutes. (Makes 4-6 servings)
(NOTE from contributor Nancy Brubaker: “A tasty side dish that can be tucked into wrap-type sandwiches. “Refried beans, shredded cheese and kale in a whole-wheat, homemade chapatti is a favorite combination at our house. Swiss Chard can be used interchangeably with Kale to help use up the plentiful greens.”)
1 thinly sliced onion
In a large frypan sauté in 1-2 T. olive oil over medium heat until brown and crisp, not just soft. Remove to a serving dish
1 large bunch fresh kale, collards, or Swiss chard
Stack leaves, roll together and slice about ¼”/5 mm thick. Sauté in the frypan for 1 minute. Add several Tablespoons water ¼ t. salt to taste. Add cover, reduce heat and steam until tender. Add water as needed. Kale and collards cook in 10-15 minutes, Swiss chard a bit faster. When the greens are tender, drain in a colander. Return onions to pan and heat to sizzling!
1 T. Tomato paste
Add and stir. When this mixture is hot, return the greens to the pan. Mix, heat through, and serve.
(NOTE from contributor Alison Froese-Stoddard, Winnipeg, Manitoba: “The first year we bought a share of an organic co-op garden we were astounded by the quality and sheer quantity of greens we received. We had to find ways to eat several pounds of lettuce, kale, and Swiss chard every week! This recipe became a quick favorite.” Side note: It’s easy to see why after tasting this dish.
1 lb Swiss chard
Rinse, pat dry, and remove stems. Chop stems diagonally into small pieces. Stack leaves, roll up, and slice in 1-inch strips; keep separate from stems. Set aside.
1 medium diced onion
In deep frypan sauté in 2 t. olive oil over medium heat until softened, about 5 minutes.
¼ cup dried cranberries or raisins (diced apple chunks will work too)
2 cloves minced garlic
3 T. white or cider vinegar
1 ½ t. sugar
Salt and pepper to taste
Add along with chard stems, cover and cook for 8 minutes. Place chopped leaves on top of the mixture (DO NOT STIR IN), cover and cook another 2 minutes. Remove from heat, stir, and serve.
Prep time 25 mins
Cook time 35 mins
Total time 1 hour
A hearty, 1-bowl vegan apple cake infused with gingerbread flavors and rolled oats. A healthier cake perfect for holiday gatherings and cozy afternoons alongside tea.
Ingredients
CAKE
CREAM CHEESE FROSTING
Instructions
Notes
*Nutrition information is a rough estimate for 1 of 10 slices with a generous amount of frosting and pecans.
* Recipe adapted from my Vegan Gluten Free Apple Muffins
* Frosting recipe from my Gluten Free Zucchini Cake

Glazed Beets
What a wild time of things! Despite the catastrophic weather conditions causing such a delay, I am looking forward to digging back into the ground candy that we’d become accustomed to during the early part of the year, aren’t you? Although I’m aware that some were getting overwhelmed with the abundance that came their way, I discovered many were distributing their unused portions among friends, neighbors, and less fortunate humans furthering the blessings of the tasty goods.
Today I’m sharing a couple recipes from other CSA’s around the country that will help get things back in order in your soon to be filled with bounty kitchens. May the food that passes your lips bring you excellent health, good fortune, and a slimmer waist line (It that is indeed your goal). Eat hearty, my friends!
Chicken stock or water
Salt, to taste
Red, Chiogga, or Golden beets, sliced
2 T. Butter or olive oil
In a deep skillet, add about 1-1/2 inch of water or chicken stock and salt to taste. Add sliced beets. Add 3 T. of butter or olive oil to the skillet. Simmer at medium high heat until all the liquid is gone. Serve immediately.
NOTE: The liquid absorbs the flavor, the beets absorb the liquid and the butter/oil, which will float to the top and glaze the beets. Add any of these ingredients to further the flavor of the beets: fresh ginger, soy sauce, garlic, onions, or fresh herbs.
Recipe by Bill Brammer III of San Diego, CA
1 large bunch of kale (chopped) Steam and set aside (If you cook it with the potatoes the flavor will be extremely strong overpowering the dish. Trust me)
1 T. Butter
1 Large chopped onion
1 clove minced garlic (I like 3-4 cloves but I REALLY like garlic)
Melt butter in a soup pot. Add onion and sauté until golden. Add garlic and sauté another minute. (NOTE: For stronger onion/garlic flavor, add these two later in the cooking process)
2 Large diced potatoes
2 c. hot water or broth
Add, bring to boil, reduce heat and simmer until potatoes are soft. Remove half of the cooked potatoes; puree the rest with the cooking liquid and return to the soup pot. Return reserved potatoes and steamed kale to soup pot. (Puree everything if a smooth texture is desired).
3 Cups water or broth
½ teaspoon salt or to taste
Pepper to taste
Add along with additional hot water or milk to preferred consistency. Heat gently until hot and serve. (NOTE: If you’re an omnivore a package of sliced cocktail beef weinies, makes this dish spread about a bit farther)
Italicized notations are from me, Mare Martell, while the recipes are from the cookbooks:
Harnish, Marie. “Autumn Soups.” Simply in Season. Scottdale: Herald, 2005. N. pag. Print.
Sochacki, Julie, and Jason Houston. One United Harvest: Creative Recipes from America’s Community Supported Farms. Kearney, NE: Morris Cook, 2005. Print.
Flower Patch Farmgirl: 10 Minute Refrigerator Dill Pickles.
Last week Tuesday I asked my Michigan living parents how they felt about becoming landlords. This week Thursday my entire Tennessee household is stored in their garage and I am still reeling. So far, I’ve learned that things can change faster than the blink of an eye. To reflect that, here are two recipes that will take you about 30 minutes or less to prepare.
 Ingredients:
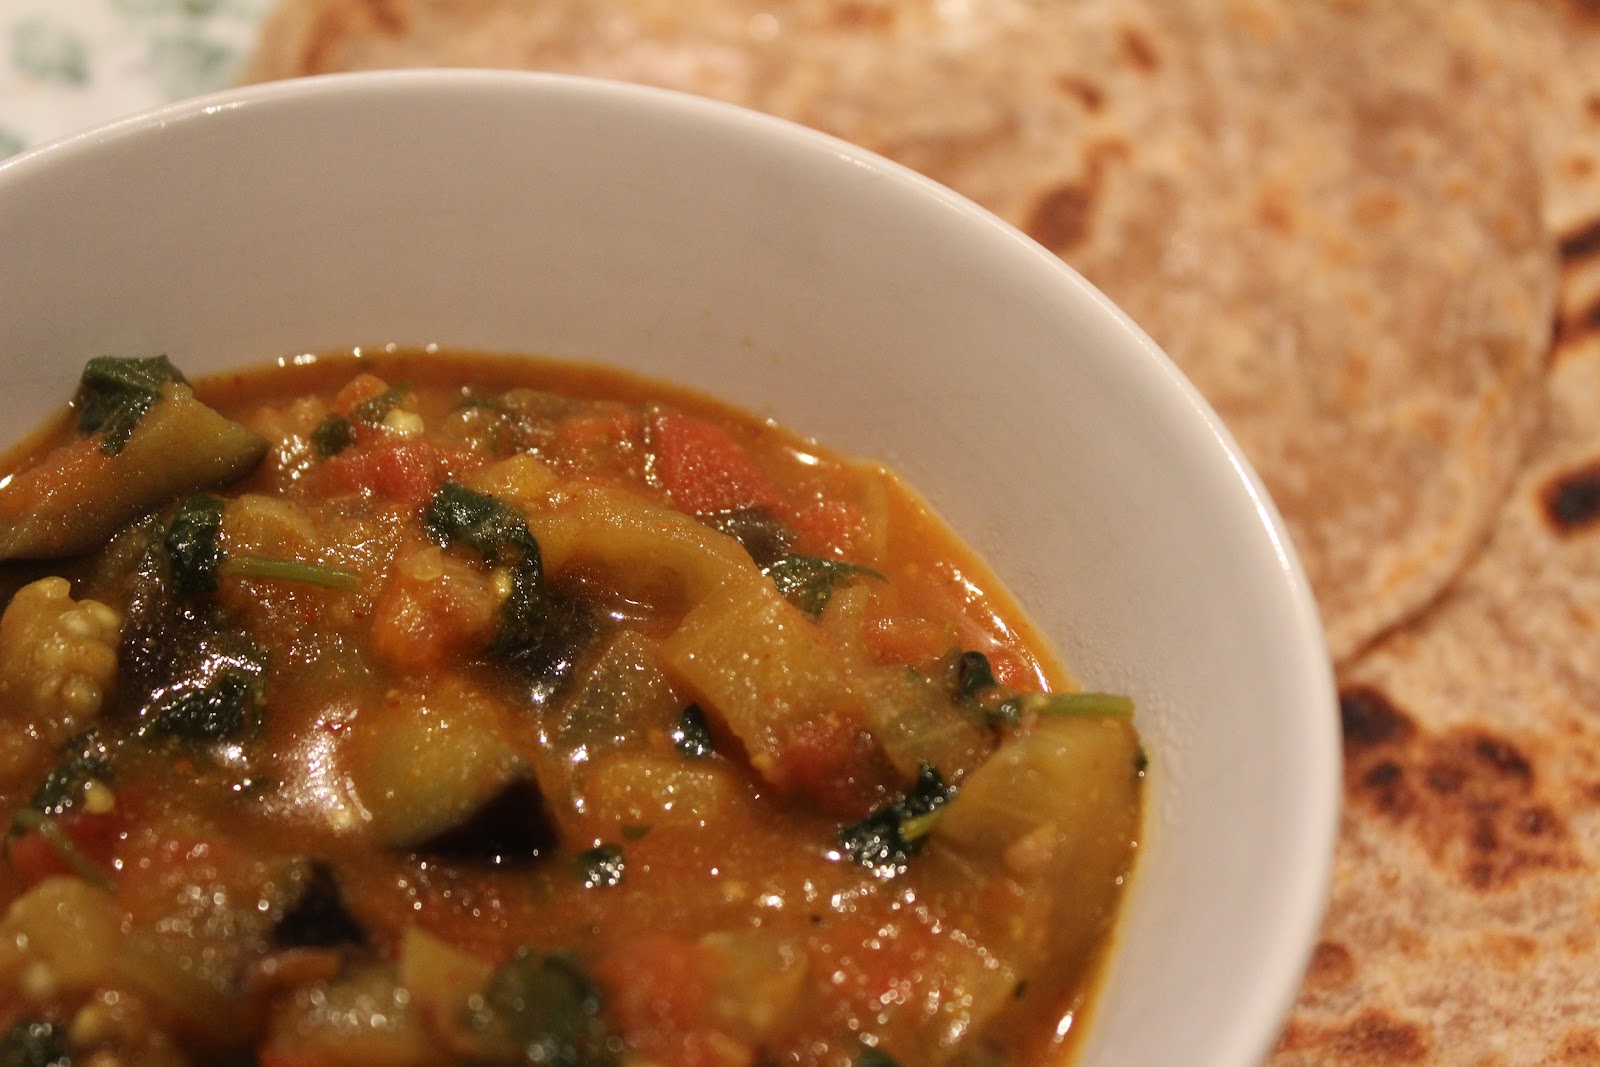
Method: To a pan on medium heat, add onions. Saute till translucent. Add Tomatoes and saute till soft. Add all other ingredients and close the lid. Cook until the eggplant is soft. This will take about 15 minutes. Serve it with some Chapati, Roti or Rice.
Recipe by Jessie:
“This eggplant goes well with some steamed green beans and French or Italian bread. Although the recipe calls for seasoned bread crumbs, you can use regular bread crumbs if you wish. Adjust the amount of red pepper flakes according to your taste.”
Quick, fast, to the point. Meals on a tight time frame because when you least expect it, life happens right now.
As a younger woman, around 26 or so, I moved in with my Gram due to unforeseen circumstances. She lived on 13 acres about 10 minutes from town. Country convenience she used to call it. In early summer along the back acres there were lines and rows of blackberry and raspberry bushes ripe with luscious fat black and red juiciness. She’d send me out with a colander to collect enough for the three of us for dessert (My Grandpa Pat, too). Dutifully, off I’d trudge.
When we got our berries this week, I dang near wept. They looked like one of the safest times in my life. They were bursting juice out of the containers as if they’d been styled by a food artist. Purple tartness pooling in the bottom of my bucket. I could hardly wait to gorge myself. But. I didn’t.
Instead, I found a non dessert way to experience the tasty goodness of Blackberries. I found the recipe HERE.

Big, purple, plump, juicy blackberries
This was incredibly flavorful with the rich blend of flavors dancing in a delectable sauce. OH BOY!

Savory stalker, celery
I still had celery left from the last time. It was still crisp and fresh. Martha Stewart had a tip to wrap the celery tightly in aluminum foil and it keeps the celery the way we like it. But truthfully, I’m overwhelmed with celery. I thought it only for sticks that you put dips and peanut butter on as snacks. I never really thought of making other things with it being the primary ingredient. Here are a couple really easy ideas.
HINT: If you’re going to make this cream soup, put together all the ingredients (you can also use vegetable stock which works just fine) but the milk and freeze. Thaw out the starter, add the milk to the thawed product and you’ll have “store” quality with homemade taste cream of celery soup. Further, keep in mind that this celery we’re getting is really fresh so the flavor is incredibly tasty. A little goes a long way, so adjust accordingly.
3 quarts chicken stock
3 pounds celery, coarsely chopped
1/2 pound carrots, julienned
1/2 pound onions, chopped
I have not tried this one yet, but it looks easy enough for even a hot day quick cook side. Plus, it also appears to have a great deal of potential as far as “doctoring” to my families likes (garlic and onion with a zing of peppers, for example). Any comments if you try it, would be appreciated. See if you can beat me to it. 🙂
www.allrecipes.com (One of the best recipe sites I’ve found. The comments really bring life to each dish.)
This summer has been a crash course for me in what vegetables actually look like, cook like, and what those “exotic” veggies in the grocery store actually taste like. I’ll admit, I’m fond of just sticking to what I know in the food department. I rarely scoop up anything that isn’t in the bargain bin anyway, so this has been quite the adventure.
I had no idea what arugula is. I really had to look it up. Go ahead and say it, “Who doesn’t know what arugula is?” I’ll raise my hand and let you know, I’m one of the ignorant. I’m looking forward to trying this. I found an easy quick (as in you can prepare it an hour in advance) pasta dish by Martha Stewart Living. Although her recipes tend to the higher end, this one seems to meet my beer budget while indulging in champagne taste.
In the bowl of a food processor fitted with the metal blade, pulse garlic until very finely chopped. Add walnut pieces and arugula; process until a coarse paste forms, about 5 seconds. Transfer to a serving bowl. Stir in the salt and Parmesan cheese, and set aside.
Bring a large pot of water to a boil. Add linguine, and cook until al dente according to package instructions, about 8 minutes. Drain in a colander, and immediately add to bowl with walnut-arugula mixture. Drizzle with the oil, and season with pepper. Toss thoroughly until coated evenly. Serve immediately.
I am a huge fan of bacon. I say that as I sit here with my well rounded bottom at a computer where my limited mobility talks to my need to be creative instead of active. But, bacon reminds me of family (No, I was not raised by pigs despite my brother’s prodding insults.) I’m originally from Michigan. We’re a hearty stock with rich curves on the women and strong backs on the men. Bacon was served commonly for breakfast, so to me, it feels like home. Here is a Paleo Recipe I found that will help the abundance of summer squash have a rich flavorful compliment.
![]() SERVES: 4
SERVES: 4![]() PREP: 15 min.
PREP: 15 min.![]() COOK: 40 min.
COOK: 40 min.
An Independent Nondiscriminatory Platform With No Religious, Political, Financial, or Social Affiliations - FOUNDED 2014
Life is a patchwork of moments — laughter, solitude, everyday joys, and quiet aches. Through scribbled stories, I explore travels both far and inward, from sunrise over unfamiliar streets to the comfort of home. This is life as I see it, captured in ink and memory. Stick around; let's wander together.
Hosanna High Community Burial Project
True wealth is the wealth of the soul
ईशा वास्यम् इदं सर्वम्
Daydreaming and then, maybe, writing a poem about it. And that's my life.
Psychology, Mind over matter
Life as an American poet of excellence
Epic fantasy & military sci-fi author.
Love Letters to the Tar Pit
Making Space for Dreams
binge thinking and other things in life


